Thai Peanut Noodles

So it’s a really uncomfortable truth for many, but one of the biggest contributions you make to the planet is to change the way you eat. To be even more specific, by drastically scaling back the amount of meat you eat, if not cutting it from your diet entirely. It’s a super touchy subject and one that tends to make some people defensive. The cold, hard, truth of the matter is that the meat industry is a HUGE producer of carbon emissions and is massively damaging to the environment. It’s unsustainable. Having entire mono-cultures and huge amounts of farmland devoted simply to feed into another mono-culture like animal protein, just doesn’t make environmental sense. There is a way to farm animals responsibly but it requires knowledge of biodiversity farming and perma-culture, and sadly it’s not as government subsidized like the massive mono-culture farming brands are. You can be a steward to the planet by making the choice buy ethically and humanely raised animal proteins. They do cost a bit more, but isn’t being humane and ethical worth it? I strongly feel the absolute least we can do as humans who chose to consume animals, is to buy from farmers that treat those animals humanely during their lifetimes.

I am a strict vegetarian for ethical reasons both environmental and humane, and am working my way to a completely plant based diet. My husband and daughter still consume ethical animal proteins occasionally but as whole we eat a mostly vegetarian diet. It can be tricky to find plant based recipes that your entire family loves, especially if they are big omnivores. This recipe is a big family favorite and everyone absolutely loves it. If you are looking to reduce your meat consumption by subbing out a few plant based meals per week, this one is a great place to start! It’s wonderful because there are no gimmicks, with no strange vegan meat alternatives that would put off a devoted omnivore. It’s just simply delicious. We have made a few tweaks to the original recipe which I will link to below in the title.  We *ALWAYS* double this because we like it so much and love having the leftovers.

20200624_181652kjlkj


Thai Peanut Noodles adapted by Nora Cooks


Ingredients
FOR THE PEANUT SAUCE:

1/2 cup natural peanut butter, smooth    (MUST be the all natural stuff, with low sugar, normal PB would be too sweet)
1/2 cup water
1/4 cup low sodium soy sauce , (tamari for gluten free)
2 cloves garlic, minced
2 tablespoons fresh lime juice (approx 1 lime)
3 tablespoons pure maple syrup
1 teaspoon Sriracha hot sauce    (to make this toddler friendly we leave this out and just squirt it into our individual bowls)

20200624_174701

FOR THE REST:
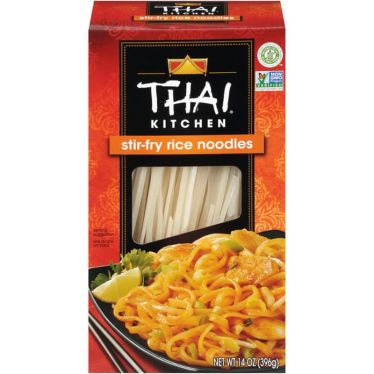
7 ounces brown rice stir fry noodles (or any kind of flat, thin rice noodles, not the super thin like mai fun noodles)
2 cups cabbage
2 carrots, peeled and chopped into matchsticks
1 red bell pepper, thinly sliced   (I almost never have this on hand and it’s fine without)
2 green onions, chopped
1/4 cup chopped cilantro         (again I almost never have this on hand and it’s fine without)
1/4 cup chopped peanuts        (again I almost never have this on hand and it’s fine without)

Instructions
-Make the Peanut Sauce: In a medium bowl, whisk together all sauce ingredients (MINUS Sriracha) until smooth. Set aside.

-Prepare the noodles: Bring a large pot of water to a boil. Prepare according to package instructions.) Drain noodles in colander and rinse immediately with cold water. Set aside.
– Meanwhile cook the veggies: In a large frying pan saute the cabbage, carrots, red pepper and green onions and cook on medium high stirring constantly for a few minutes in batches until they are slightly cooked, but still crunchy.

-Pour the peanut sauce mixture into the large pot used to cook the noodles. (You can be really efficient and rather than mixing the sauce up separately just measure and dump it into this big pot after you pour out the noodles) Bring the sauce to a low boil and stir until thickened and glossy, it should come together really quick. Add the noodles and veggies to the sauce mixture and combine.

-Serve with the cilantro and peanut garnish if you have it. Squirt a squiggle of sriracha in your bowl if you like a little kick, but it’s delicious without as well. Enjoy!


Some notes about the recipe-

I think it’s critical to use all natural peanut butter. Before the pandemic shut down the bulk foods section at Whole Foods, we used to LOVE their organic peanut butter grinder and would get mason jars filled with that nearly every other visit. Since that has closed we have switched to 100% Peanuts. I just don’t see the need to add sugar or palm oil to peanut butter. I’m always shocked at how abnormal that notion seems to be, and how hard it is to find just straight peanut butter. This is what we use and it’s been a fantastic substitute. Still miss my fresh ground pb, though.

just peanuts

Also, I absolutely DO NOT recommend the rice noodles pictured above in my ingredients photo. It was the only kind I could get in my grocery delivery and the amount of over packaging was insane, I would never buy them again. Instead, this is the kind we typically use when I can find it.

large_09da8271-3a82-4640-b754-651291f9fbb7


I hope your family enjoys this recipe as much as mine does. You should absolutely try it!

Break bread with me

Let’s talk bread. It’s delicious, obvs, and my family probably eats too much of it. Ever since I learned about Glyphosate being used on a disturbingly large amount of America’s wheat, and by default most commercially available breads, I have been *very* watchful about the sources of grains that go into my family’s mouths. To be 100% sure what my daughter is eating at nearly every lunch time, we switched to making our own bread.

Now I wish that I was some super awesome homesteader type that made my own artisan loaves from a homemade starter…. but I’m not. I barely keep my shit, I mean house, together as it is. So I rely on my trustee Cuisinart Bread Machine.

20200619_072809

One way you can lead a more sustainable lifestyle is to buy things secondhand versus new. That’s exactly how I got my bread machine. I found this practically new Cuisinart CBK-200 for $80 on the facebook marketplace. Not only is it way more sustainable and earth friendly, but I paid nearly half what it would have cost new. I find that niche household appliances are amazing things to buy used. So often people swear they will “make ice cream/waffles/paninis every day!” and then use them once to collect dust ever after. Pretty sure that the bread machine had suffered the same fate.

The other reason I wanted to start making my own bread was to avoid the plastic bags that bread is sold in. Once you get in the habit of really reducing your waste and outgoing recycling, you start to see where you are really producing. We were going through a minimum of one, and sometimes two store bought loaves of bread a week. That’s 2 plastics bags per week times 52 weeks =104 bags a year! Granted we always recycled these bread bags but the end goal is not to recycle more, it’s to reduce as much as possible.

The recipe we use calls for bread flour, salt, sugar, water, milk, butter, and yeast. That’s 6 ingredients if you don’t include water. I love knowing *exactly* what is in our bread. We use strictly King Arthur bread flour which is non GMO, and they are a B Corp which always gets my support. In addition, the bags of flour come in paper which can be composted. We have actually switched to making our bread completely Vegan with no difference in taste (dare I say perhaps even better?) by using Earth Balance vegan buttery sticks and Oatly Oatmilk. It is important to use a higher fat content vegan butter like the buttery sticks as several other vegan spreads I tested did not work.

20200623_111849

In addition to being a greener choice I have to mention that this bread is SOOOOO delicious and just infinitely more tasty than any pre-cut stuff you can buy. There is no comparison and there’s really no way we could go back to eating the store bought stuff. Over this past Christmas we had to supplement with bagged bread and it really drove home how much we have come to prefer freshly baked bread. It takes me maybe 4 minutes to dump the ingredients in and press the button. Three hours later you have an amazing loaf of bread and your house smells fantastic. Soon I will begin the search for my new go-to bread machine recipe as I have stop eating gluten for good. Luckily this bread machine has a setting for gluten free bread.

Our go-to recipe thus far, King Arthur Easy as Can Be Bread Machine Bread. We set our machine to light crust and 1.5 pound loaf, we always use bread flour but it says you can use AP flour as well.

Instructions

  1. Put all of the ingredients into your machine in the order recommended by the manufacturer. (water, milk, butter, sugar, salt, flour, yeast)
  2. Program the machine for basic white bread, and press Start.
  3. When the loaf is done, remove the pan from the machine. After about 5 minutes, gently shake the pan to dislodge the loaf, and turn it out onto a rack to cool.
  4. Store, well-wrapped, on the counter for 4 days, or freeze for up to 3 months.

Do you use a bread machine? Do you have a good gluten free bread recipe? If so, let me know!

Let’s Talk Laundry

There are so many easy ways to “green” your laundry! And yet again, they are easy AND less expensive than our current conventional methods.

Let’s start with clothes dryers. They are super convenient, but they are AWFUL for the environment.

“If all households with a tumble dryer dried one load of washing outside each week, instead of by machine, they would save over a million tonnes of CO2 in a year.” – Tread lightly: Switch off your tumble dryer

That’s a *massive* reduction in C02 emissions! Luckily you don’t have to invest in solar panels to harvest the awesome raw energy of solar power! You can just line dry your clothing! We have been doing 90% of drying via line or hang drying for about a year and I gotta say, I love it. I enjoy stepping outside and the peaceful act of pegging my laundry.  I also love how wonderful my clothes smell when they have been line dried in the sun. We have a Brabantia line dryer and I LOVE IT.

20200407_112407
Our wicked sweet Brabantia.

There are other benefits to line drying your clothes. Aside from the lovely smell it’s also much gentler on your clothing, meaning your clothes last longer which is also an eco-win. On a sunny day it’s shocking how fast your clothes can dry. It’s actually faster than machine drying. Before we upgraded to the Brabantia we used this collapsible clothing rack which worked fine but it didn’t have nearly the same capacity or awesomeness.  If outdoor and indoor space is an issue, you can always use one of these collapsible wall mounted units. We plan on getting two for our laundry room at some point for rainy days.

It’s also important to look at what you are using to wash your laundry. You want to make sure that the detergent you choose is both environmentally friendly in composition as well as packaging. You don’t want to be washing your clothes in yucky chemicals that are bad for you AND putting nasty stuff into the water stream. It’s a win if you can avoid buying detergents in plastic or hard to recycle/non recyclable materials. We have made the switch to Dropps brand laundry detergent (and dishwasher detergent) which is an eco friendly formula that comes in compostable cardboard packaging. I like that it comes in pod form because I think they are cute and easy to use. Our family is super happy with their effectiveness, we’re fans. As an added bonus, I love that I no longer have a huge whopping detergent bottle that takes up a massive amount of space and drips everywhere.

You can also look into a refill service such as Fillaree which will mail liquid detergent refills to your home and you mail back the empties when you are done. Or you can look into what possible refill options you have close to where you live.

20200407_100025_2
Our laundry set up.

You’ll also notice those balls there, too. When we do use our dryer, these wool balls have totally replaced dryer sheets in our home.  I can say with complete and total confidence that we will never use dyer sheets again. Wool balls work SO much better! Dryer sheets are a single use product which is bad for the environment. They are also full of undisclosed fragrances (chemicals) and other bad stuff that is bad for you, too.  It’s so easy to use wool balls. You just chuck them in with your load of wet laundry and let them do their magic. They bounce around and circulate the warm air more evenly to your clothing which in turn makes your load dry faster=more energy efficient. They reduce static, last for YEARS, and they are compostable. You can find them everywhere, from Amazon to Target, but here is a link to Friendship Wool which is a highly ethical and fair trade brand.

20200407_090818
Check out that fresh Filtrol 160

Our household also invested in a Filtrol 160. Microplastics are HUGE problem and one of the main contributors to microplastics entering the water stream is through washing of synthetic clothing.

“Microplastics can be toxic to wildlife on their own, but they can also act like sponges, soaking up other toxins in the water. Worse, they can be ingested by all sorts of marine wildlife and accumulate in the food chain. A recent study found around 73 percent of fish caught at mid-ocean depths in the Northwest Atlantic had microplastic in their stomachs. Even the animals that live in the Mariana Trench, the deepest part of the ocean, are eating microfibers.“- Link

Since it’s nearly impossible to wear clothing made only of natural materials we felt it was important to make this investment. The Filtrol 160 is pretty affordable at $140 and does not require a plumber for installation.  I made a pretty crappy video below about our Filtrol. As always, don’t hesitate to reach out if you have any questions! I will always try to answer them as best I can. I hope I have convinced you to Green your Laundry routine! 🙂

Clean Energy without Solar Panels

There are no end of easy switches around the house that you can make to “green” your life… BUT the best way to be more green is to tackle the big stuff, your biggest source of carbon emissions. For nearly everyone this boils down to your home’s carbon footprint, your car’s carbon footprint, and your air travel. Most people don’t have that much control over the car they currently have, but we can talk about a very easy switch you can do TODAY from home, without investing in solar panels.

We took the plunge and installed a full solar panel array on our roof last year but before that we had switched to Arcadia Power. This is a fantastic option for SOOOOOOO many of you! If you rent, do not have good solar panel potential (which you can check out here at Google’s Project Sunroof), or simply cannot afford panels because they are a hefty investment, then Arcadia Power is great way to offset your biggest emissions source. When we were using them it did cost us *slightly* more per month for our electricity, a whopping $5. If you are reading this blog post then I am pretty sure you are the type of person who would be willing to pay a tiny little bit more for electricity you can feel GOOD about. They can explain better than I ever could how it works and they even have a cool dashboard you can use that shows you how much CO2 your household has averted.

190628094906-underscored-arcadiapower-super-169

I implore everyone who reads this to please, *please*, *PLEASE* check out Arcadia Power as a greener energy source option!

Here are a few more sites that have a better breakdown and review of Arcadia Power’s services that you might appreciate:

https://thecollegeinvestor.com/22913/arcadia-power-review/

https://www.cnn.com/2019/06/28/cnn-underscored/arcadia-power-renewable-energy/index.html


*As a note- we love our solar panels. Ours were purchased and installed by 8M Solar here in Raleigh and we have been super happy with everything from purchase to installation and would highly recommend them. For us it made sense to take out the loan necessary to procure the panels as the loan amount is less monthly than our previous electricity costs. We don’t have an electric car, yet. But we hope to be able to afford one in the very near future! We can’t wait to use our car charger!

20200407_153311IMG_20200407_130257_717


Aquafaba Mayo for the win!

Necessity is the mother of invention. In the midst of this pandemic, and it’s ensuing food shortages, I found myself without Vegan mayo the other day. A travesty I know. One thing I do always have on hand is multiple cans of garbanzo beans. I eat chick peas nearly every day. Since transitioning to a mostly plant based, but completely meat free diet, they have become my favorite protein. I had heard of the magically properties of the liquid, Aquafaba, that chickpeas are canned in, but had never ventured to cook with it.  I was highly skeptical that I would actually like Aquafaba mayo. I don’t hate all Vegan/plant based substitutes, but I don’t like most of them if I am being honest. We went through several brands before we even found a pre-made/storebought version that we cared for. Not surprisingly it was Hellmans. This is the one that my homemade version would need to live up to.

20200329_103133I had all the ingredients on hand so we went for it. I was legit shocked when it turned out AMAZING. Even more befuddling is that it actually does taste like mayo. *Just* like regular mayo. The only hitch was that our batch was SPICY. We followed the NYT recipe which called for 2 tsp dry mustard which I thought seemed like a lot, but I generally try to follow a recipe as written the first time through. It was the spiciest mayo I had ever had. That being said, it did grow on us. It was nice on our Beyond Burgers and I think it would be delicious in cole slaw. I made this again today and reduced the dry mustard by half and that resulted in a more typical tasting mayo.

20200329_105157
After about 5 minutes of slowly dribbling the oil in while using the immersion blender it ends up looking beautiful like this.

If you eat canned chickpeas you should definitely try this recipe sometime! It’s really delicious and makes full use of your can of garbanzos. It’s also dirt cheap to make.


Aquafaba Mayo

Ingredients-

1/4 cup reserved liquid from can of garbanzo beans/chickpeas

1 tsp white or apple cider vinegar

1/2 tsp fine salt

1/2 tsp sugar

1 tsp lemon juice

1 tsp dry mustard (or 2 tsp if you want it spicy)

3/4 cup of neutral oil like sunflower or canola (we have used canola each time)

Directions-

Combine all ingredients except the oil in a large measuring cup. Blitz with the immersion blender. Then, very slowly pour oil into the measuring cup with the other ingredients while running the immersion blender the entire time. It will take about 5 mins for the mayo to emulsify and thicken. Enjoy!

*Adapted from NYT Cooking

Are you STILL using paper towels? That’s *so* last year…

I have been meaning to start this blog for some time now but never could find the time. I suppose that is the silver lining of this whole Corona Virus mess we find ourselves in. Most of us have loads more time at home, and we find a need to try and conserve resources. This makes now the perfect time to make some positive changes to our habits.

Let’s start with one of the easiest changes AND one that turned out to be the most surprisingly wonderful for me…. Ditching the paper towels. Now, I *loved* paper towels. LOVED them. I used to them for EVERYTHING. I used them as napkins and for cleaning up messes in the kitchen. They were even my primary cleaning method for bathrooms too.  I even used them for cleaning the shower, which I feel particularly stupid about now. So to be completely transparent, I was scared of transitioning away from them. How was I going to do that and survive!??!

It turns out that I VASTLY prefer using Bar Mop clothes to paper towels in every.single.way. For real. They are just simply put, better. A spill on the counter that used to take a million paper towels, gets wiped up easily and effortlessly in seconds by a bar mop. It’s actually less work. Instead of constantly traveling back to the paper towel roll for more, I can clean every counter surface in a fraction of the time with my bar mop. At the very least I use one a day, but often I use two. When I’m not using them I just drape them over the edge of sink front to dry out a bit. 20200325_161214 At the end of the day I throw them over the edge of a little laundry hamper I have in my mud room. Every weekend I wash the week’s worth with whatever other towels we have used in the house.

These are the ones I purchased from Amazon that I have been super pleased with. When you first get them the fibers are very compacted and they don’t feel soft or like they would be very absorbent. Definitely wash and dry them at least once before using. I thought I would need to get a second pack, but so far one pack has worked for our household. The greenest option would be to forego buying these AT ALL, and simply make your own out of an old towel you may not like or need anymore. Simply cut it into bar mop cloth sized bits with pinking sheers if you have them, regular scissors if you don’t. This is what I would do now, or will do when we need more of these bad boys in the future. Lord knows I have too many towels as it is.

I store my clean bar mops in a little basket in my drawer now. In the past, before my kitchen renovation, I stored them rolled up in a glass jar on my counter. This is a great option if like me back then, you don’t have room in your drawers. 20200325_161129

20190327_161225You’ll also notice that I use cloth napkins! No more paper towels for napkins anymore! Huzzah! I also sourced them from Amazon.  Again, the most eco-conscious choice would be to buy these thrifted or make your own out of perhaps an old sheet that you sew around the edges to keep from fraying. I treat these the same as my bar mops, they go in the same small laundry basket and get washed together every weekend.

I should note- these will get stained. Both the bar mops and the napkins. Initially these stains bothered me and I would bleach them with every load. But bleach is not environmentally friendly, and it wasn’t getting them back to totally white anyway. I made the decision quite a while to just stop caring. These are for me to clean with and for my family to use. They are not my fine dining napkins, I don’t pull them out for special occasions. We know they are clean and that is good enough for us, even if they have a spaghetti stain on them.

So, in closing, I STRONGLY urge you to either make your own, or order a set RIGHT NOW of bar mop cloths and cloth napkins. Then, once they are washed and ready, move your paper towels somewhere less convenient to access. If you leave them in the same place they have always lived you will continue to use them. I just moved mine under my sink versus next to it. It was enough of a change that it stopped me from using them.

I still keep paper towels on hand for things I *really* don’t want to clean with bar mops, mostly cat pukes. But now we ONLY buy 100% recycled paper towels and that’s pretty much the only thing we use them for.

Switching to cloth saves us money, saves us room, they are more effective, and it’s better for the planet. This is one of the best switches you can make! Try it! I promise you will never want to go back!

Granite & Stone Cleaner Spray

I really wanted my first actual “Green” post to be about the big stuff- you know, like how to tackle the most important thing first, your biggest source of carbon emissions. BUT, as scared as I am to do this, I would like to address that via a short informative video and I am just not *quite* there yet with my set up. So, in the meantime, here is the recipe that I use clean the granite counter tops in my kitchen bathrooms and the marble counter tops in my powder room. Since I found myself having to mix up a batch of this today I thought I would snap a quick pic and post about it.

20200323_130541

Just look at that high quality photography right there! Anywho, there are many benefits of this spray versus store bought. Firstly, you know exactly what is in it, and there are zero icky chemicals you wouldn’t want around your kid or on your work top. I used to panic inside slightly when I would be spraying Lysol kitchen spray or some other equivalent around while OG was in her learning tower, and I never wanted her to “help”‘ me wipe it up. That should have been a red flag. You might be asking yourself how buying two plastic bottles, castille soap and the alcohol bottle is more environmentally friendly that buying one bottle of Lysol. Well, for a start I can make nearly a gazillion refills for my 16oz spray bottle with these two bottles. This recipe calls for a measly 1 teaspoon of Castille soap and 2 tablespoons of Alcohol. Also, both these bottles are fully recyclable in Wake county, including the lids, unlike the sprayer top on a pre-mixed store bought formula. I measure this up, pour it into my reusable spray bottle, and rock n roll. So in the end it’s WAY less plastic bottles and sprayers going into the landfill, or even into the recycling bin. It also works just as well and is SOOOOOOO much cheaper. There are literally no downsides to this switch.

I can’t take credit for this recipe, though. This is one of many Clean Mama recipes that I use to clean my home. I follow her blog Clean Mama and own three of her books, including my two favorites, The Organically Clean Home and Simply Clean.

Clean Mama’s Granite & Stone Cleaner-

Ingredients:

  • 2 tablespoons rubbing alcohol
  • 1 1/2 cups water
  • 1 teaspoon castile or dish soap (if you want your spray to smell like your dish soap, use that)

Directions:

Measure out water in a large measuring cup (I used boiled water) and add rubbing alcohol and castille soap. (I also add 2 drops of essential oil but this is optional) Pour carefully into a spray bottle. Enjoy!

Link to the original recipe page- Clean Mama’s Granite Spray

First Blog Post! Woot Woot!

Well, shit! Here goes my first blog post. Bear with me as I learn to drive this thing called WordPress and my numerous grammatical errors!

My real mission with this blog is to make switching to a greener lifestyle something that is more sustainable, achievable, and less stressful to the average person or family. I believe that all (unless you totally suck) people want to do better for the Earth, want to be more sustainable, and want to do it NOW. I think we have been led to believe that this is arduous, expensive, ineffective, and just plain hard to achieve. I want to dispel those notions and show how easy, rewarding, and effective these greener alternatives can be. I plan on breaking this down into small easy steps accompanied by short video tutorials or examples if they are needed.

This is a journey of progress, not perfection! Every *little* bit counts, and every *little* change magnified by the number of people who make it snowballs into a huge difference for our planet. I am by no means an authority. I have no special degrees, and I don’t claim to be zero waste. I am still learning and have a ways to go to be where I would like to be on this journey, but I do know that I am trying and have already come further than I would have thought possible when I decided to first start making changes back in October of 2018.

In addition to my more eco-centric posts, I will also be sharing general lifestyle stuff such as vegetarian and vegan recipes that my family enjoy, and hopefully progress photos and posts from the permaculture garden my husband and I intend to break ground on this year. I am looking forward to sharing the journey with you. Now, let’s GET FREAKING GREEN!